By
Justin Hoffman
If a picture speaks a thousand words, anglers all over the world must have many novels to their name. The art of fishing photography has come a long way from the days of “stringer shots†or “grip and smile†images, with new adaptations enabling anglers to better convey the excitement they experience while out on the water. Taking a perfect fishing image does not have to be a difficult task, in fact, the skill can easily be achieved by following a few simple rules and preparing the scene before making that fateful “click.†Come and explore the magic that the camera holds, and begin filling your photo album with spectacular shots.
Getting That Great Shot
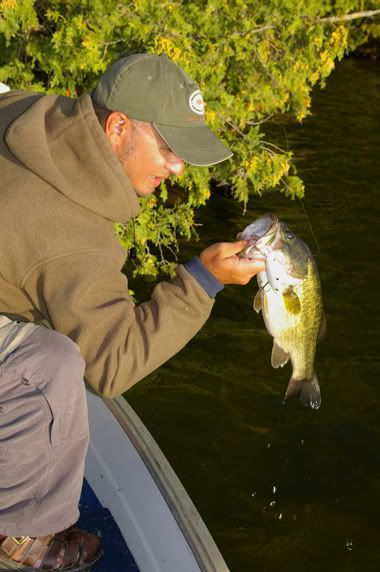
For the most part, an average fishing photo consists of a happy angler posing proudly with their prize catch in outstretched hand. Although there is nothing wrong with an image of this type, being creative while out on the water will truly make your photo album come alive.
The first thing I like to consider when striving for a great shot is variety. Make the effort to move around and shoot from many different angles for increased perspectives of the catch. This can be in the form of horizontal and vertical formatting and also close-ups and wide-angle shots. Getting down low in front of your subject or shooting from above the angler will enable you to achieve depth and interest in your finished product.
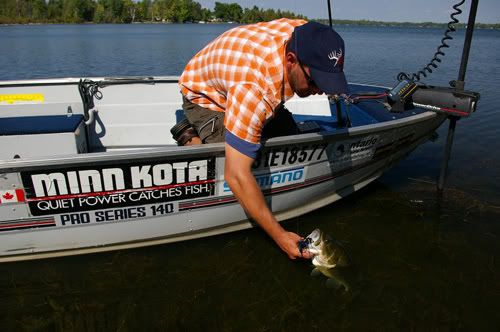
One of my favourite tricks I employ when on a photo shoot is actually getting out of the boat to shoot some film. Some of my better shots have been when I’ve set up on the shore or a dock and shot out toward the boat and angler. This can create an interesting perspective and really contributes to a dynamic shot. Some ideas for composition would be having the angler releasing a fish over the side of the boat, getting him or her to cast directly towards the camera (creating a three dimensional image if shutter speed is set accordingly,) or an action shot depicting the splashing and rod bending of a fighting fish. The possibilities are endless once you take a step out of the boat.

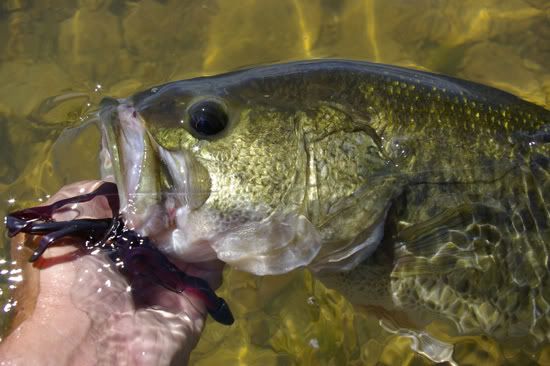
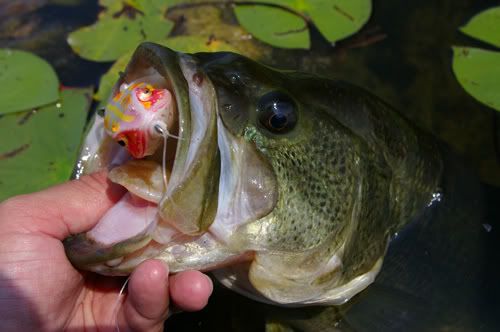
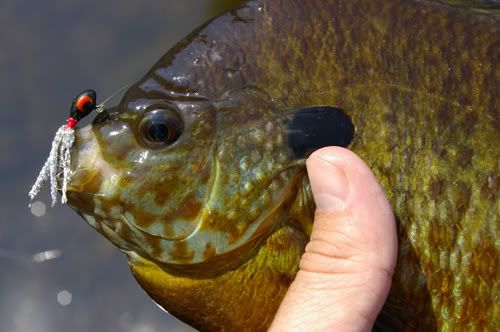
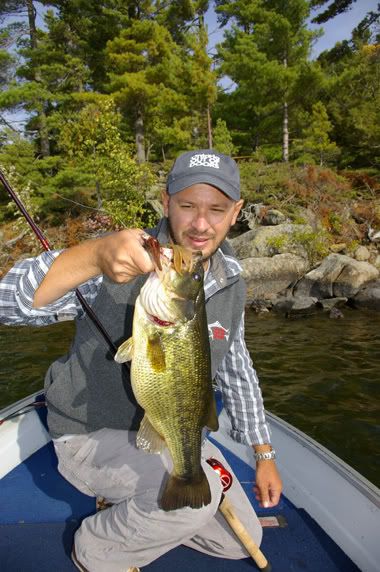
Another interesting technique I use is shooting close-ups of the fish themselves. Fish have the most brilliant colours in the animal kingdom, and this is really evident when they fill the entire frame of your composition. How about a close-up of the striking colours of a bluegill, or a lunker largemouth being gently released into a mat of lily pads?
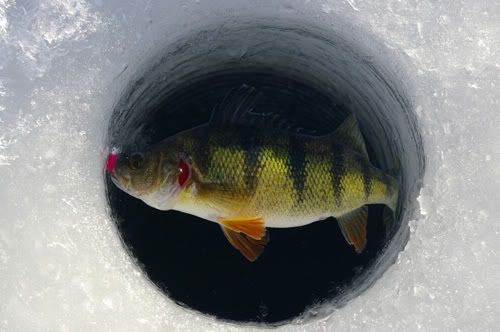
Perhaps a crappie being brought up through an ice hole or a giant musky being held in the water awaiting release? Realizing that fishing photography does not have to always include an angler in the shot is a great step towards unleashing your creativity while out in the field.
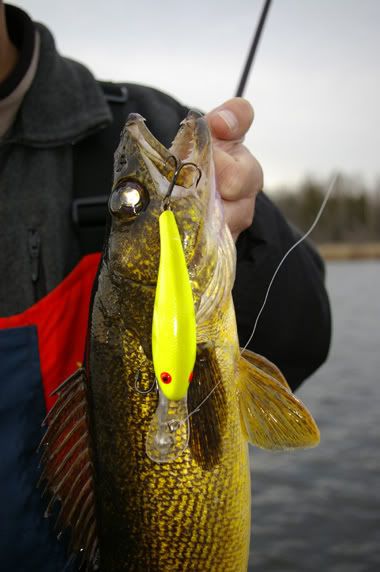
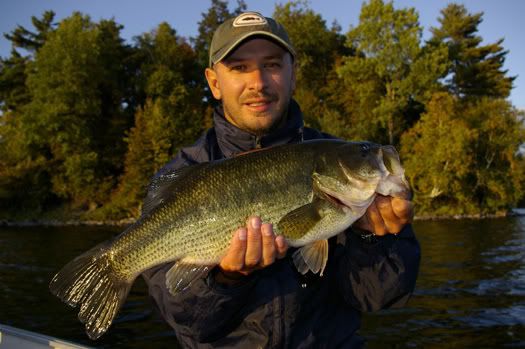
Colour is one of the few things in fishing photography that can either make or break an image. Without vibrant colours in the scene, the shot takes on a washed-out and unappealing look. There are a few tricks that you can use to make your pictures stand out and attract the viewer’s attention. Leaving the lure in the mouth of the fish will add contrast and a hint of colour that can tie a photo together nicely. A bright chartreuse crankbait against the mottled body of a walleye adds appeal and contrast to the finished product. (Plus it acts as a life-long memory to what that trophy fish fell prey too.)
The clothing that the subject angler is wearing can also dictate how vivid or striking the end product will be. There are certain colours that stand out and “perform†best on film – red, yellow and blue being my top three to work with. Reds, in particular, tend to leap out of a photograph – especially when they are surrounded by more muted shades. Having the angler wear a shirt or pants in one of these hues will definitely draw the viewer’s eyes into the picture.

While on a photo shoot I always make a point to bring an assortment of garments and hats to add variety to each of my shots. The end result is individuality in each of your image – something that just can’t happen when every photo in the album looks similar to the next.
Keeping your shots looking natural is necessary for a realistic shot. Try to stay away from taking photos of your subject on shore (especially in the backyard or beside buildings!) or in their kitchen with an obviously dead fish. Keeping fish for the table is certainly ok, but photos of this nature seem too unnatural to give them any merit. Taking fish off a stringer before shooting your photograph is also suggested for a more life-like image.
Documenting the entire day is also a great way to record your fishing experience. How about a shot early in the morning as the boat is being launched, or of the beaver lodge you pass by on the way to your honey hole? Creating a storyline of the events leading up to a great catch will create a more meaningful memento to show off in your photo album.
Pay Attention to the Background
Let’s face the facts. We have all been guilty of rushing to shoot off a picture only to discover that the angler mysteriously had a tree “growing†from their head! Making sure that your composition has a pleasing background is one of the most important aspects to fishing photography, and believe me, the results will speak loudly for themselves. Finding a background that is both pleasing to the eye, yet not too “busy†looking is the key ingredient. Vibrant fall leaves, a row of cattails or a decaying boathouse are just a sample of backgrounds that will add boldness to your prints.
Before taking that first shot, have a look around in all directions to see which area would make a more interesting addition to your masterpiece. If you have access to a livewell, carefully put the fish inside and take a quick scoot to see if anything of interest lies just around the corner.
The Sun – Friend or Foe?
The sun can work for or against you while out on the water, and adaptation is the key to having the “yellow globe†on your side. When shooting under bright skies, always remember to keep the sun at your back. Having the light shine on your subject will lighten up shadows and brighten the image. Mid-day sun, however, can create harsh light that may make your shots appear washed-out and over-exposed. Generally I choose to do most of my picture taking in the morning or evening hours when the sky takes on a soft glow, resulting in a more pleasing shot.
While on the subject of light, the use of a flash can be an important addition for superior shots. Using a camera flash will brighten the shadows on a subjects face (especially since most anglers wear hats,) and make the sheen of the fish more striking. Most cameras come with a “fill-flash†which has a striking effect in making the fish really stand out.
Polarizing filters are a great addition to a photographer’s bag of tricks, especially when shooting around water. Using the same principal as a fisherman’s polarized glasses, a lens of this nature will eliminate glare from reflective surfaces and reduce the effect of haze. Colours become more saturated – skies turn bluer and grass is greener – because you have removed glare that your eye might not of even noticed. A polarizer works best when your camera is pointed at a right angle to the sun. Attaching the filter to the lens and rotating it until all unwanted reflections or glare are gone is as little as it takes for an improved shot. I shoot a lot of film with a polarizer, especially close-ups off fish in the water, during “blue-bird†skies and when I want certain aspects of the scene to stand out more vividly.
Take Care of Your Subject
Keeping a fish out of the water for extended periods while taking photographs can be detrimental to its health, so a few precautions should be taken while filming. Make sure fish are only out of the water for very short moments – when you need to take a breath, so does your catch.
Incorporate your livewell in order to keep your fish wet and healthy. Take care to handle the fish as little as possible. This will ensure that the protective slime will remain intact. Treating your catch with kindness will enable you to get the shot you want while protecting our valuable ecosystem at the same time.
Fishing photography is a great hobby and an excellent way to document your time spent out on the water. Take the time this season to try new and different things in order to improve the quality of your shots – the results are sure to dazzle and delight!
Ten Tips for a Better Picture
#1. Variety is the key to interesting photos – shoot from different angles and positions.
#2. Get out of the boat for an added dimension to your images.
#3. Take close-ups of the fish themselves.
#4. Make sure that the background is pleasing to the eye before snapping away.
#5. Incorporate colour into the shot – reds, yellow and blues are striking on film.
#6. Keep the sun at your back in order to banish shadows.
#7. Make sure the shot has a natural feel to it – no stringers, parking lots or backyards.
#8. Document the entire day – this will create a storyline in addition to your prized catch.
#9. Experiment with a polarizing filter to add colour and lessen glare.
#10. Take plenty of shots and most of all – Have Fun!